Okay, so before heading out to spend the day with my brother, I did a bit of maintenance on Wanda that I should have done for some time now.
I pressure washed the inside of the septic tank, or otherwise known as the “Black Water Tank.”
As we know or can understand this can get dirtier than your Greywater Tank, due to the very nature of, shall we say, what goes down into that tank.
So, first of all we need a wand that will reach down into that black water tank and wash the walls for us. That is best done with this contraption that I found at a big box retail store and not at an RV dealership.


If you notice the end there is a bar that spins and two nozzles at the end of it which will not only spin the bar around but wash the walls as well.
In order to do this you will need a few things:
1. Two water hoses (rated for fresh water)
2. A Y-Splitter
3. That wand washer (thing)
4. Your sewer connection hose.
First, you connect your sewer hose to your rig, and making sure it is ready and able to drain nicely.

You will notice here that I have a hose support rig that bends and goes down on an angle so as to allow the water to flow nicely.
This is quite handy and I recommend getting one of these, along with rubberized work gloves so you are not directly handling the business end of that pipe.
Also, note the clear pipe that is between my sewer connection and the pipe. This is quite handy as it lets me see when the water is finished draining out of the tanks
Not only that but by looking at the water flowing out of the tank, I can see what colour it is. The colour is necessary in this procedure so as to know when the tank is clean.
Next you connect the two hoses to your handy dandy water supply tap. After that you connect your two water hoses to it.

Next you connect one hose directly to the “septic tank flush” connection. This is connected to a series of nozzles located inside the tank that is supposed to clean the tank for you.
This helps but it won’t clean the pipe leading down to the toilet or the bottom portion of the toilet, from the under the bowl and down. This wand thingy will.
What that septic connection will do is help flush what you are knocking off of the walls out of your tank and into your septic drain hose.
Next you run the other hose into the RV and make sure it reaches the bathroom. Here is what mine looked like.

Next you connect the wand washer (thingy) to that hose and make sure it can easily reach that toilet.
Thankfully this wand has an on/off valve on it, make sure that you turn that valve off before turning the main water supply on or you will have a very wet bathroom.
With the water on, the septic cleaning nozzles will be flushing the septic tank, as they are supposed to do. What you do is go inside your RV, pick up that wand and start cleaning.

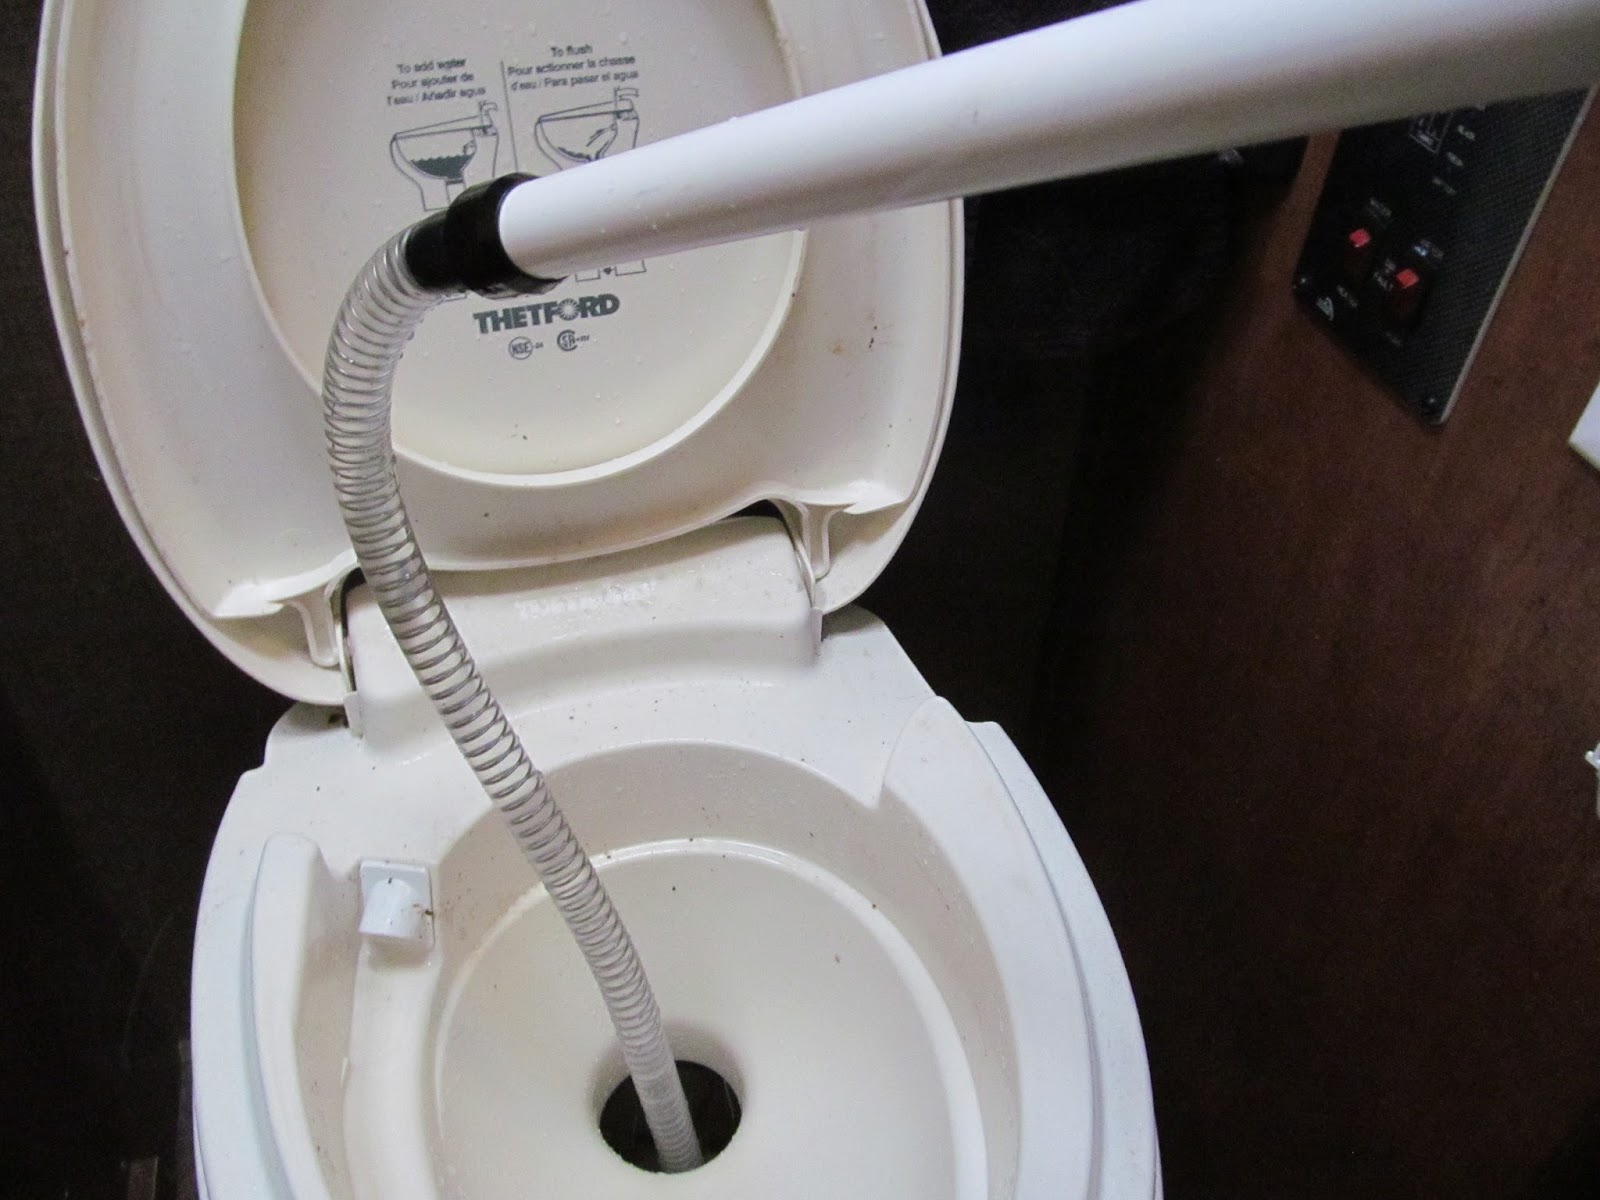
How you do that is step on the foot pedal to ‘flush’ the toilet. As in, open that valve in the bottom of the bowl and leave it open.
Stuff the business end of that wand (thingy) into the toilet and past that valve before turning the on/off valve on.
Next what you do is slowly lower and raise the end of that wand down that pipe, lingering just under the bowl of the toilet.
Once you are down into that septic tank you can then try to swish it around a bit. Again, the point of the whole exercise is to clean that tank out, so do this for a bit.
If possible, have someone monitoring the colour of the water gushing out the other end of the sewer connection pipe.
Keep cleaning until nothing but clean water is rushing out. That’s it, you’re done! Pack it up and clean up.
Since we are on the subject of water hoses let me mention a few things about them. First of all you don’t need an ‘RV rated’ hose what you need is a hose rated for ‘drinking water’ and a good one at that.
What that means is that the inside of the hose is rated to be able handle water that is meant for drinking and not contaminate it in any way.
The RV rated hoses are also designed not to break down and pass little bits of hose into your water pipes.
Why this is important is because if those bits get into your water pump they could damage it, and probably isn’t all that healthy for us, either.
To insure that does not happen, I bought a small mesh screen and put it on the end of my filler nozzle. This is what they look like.


That filler nozzle is a small hose with an on/off valve on it. This way I can control the water flow at the fresh water filling station and not at the water tap. Trust me this is important once the tank gets full.
With regards to the hoses themselves get a commercial grade one and one with a decent hose connection on it, here is an example,

The darker hose is a commercial grade hose, the red hose is a standard hose. The commercial grade hose has a connector on it that is one piece and, if needed I can put a wrench on that to turn it.
Trust me, this is important if it is four in the morning and you are trying to pack up camp so you can drive to work.
At that point, you do not need to have a hose connector that spins and spins and spins and so you never get the hose to come off.
I even contemplated cutting the hose off and leaving it there as I drove down the highway to work. I would then have wrestled with it after work, but I was eventually able to get the hose off.
That is all for today, sorry for the log blog entry, but I hope some of you find it helpful.
As always: Keep your head up, your attitude positive, and keep moving forward!
No comments:
Post a Comment